For long-term property owners, some milestones are simply unavoidable. The 40 year certification city of miami is one of the biggest. Waiting for that official notice to land in your mailbox is a recipe for stress, often leading to rushed 40 year recertification inspections and a much higher 40 year recertification cost than you anticipated. Planning ahead is the smartest move you can make. It puts you in control of the timeline, the budget, and the entire process. This guide gives you a clear strategy to turn this mandatory requirement into a manageable project.
Key Takeaways
- Get Ahead of the Deadlines: The recertification process has firm timelines, so start planning long before you receive an official notice. A pre-inspection can reveal necessary repairs early, giving you time to budget and complete the work without the stress of a looming deadline.
- Focus on Structural and Electrical Safety: The inspection is a detailed review of your building’s core systems. A licensed professional will assess everything from the foundation and concrete to the main electrical panels and life-safety features to ensure the property is safe for continued use.
- Assemble Your Expert Team Early: You are required to work with a licensed engineer or architect for the inspection and final report. Bringing them on board early, along with a permit specialist to handle the paperwork for any required repairs, is the most effective way to ensure a smooth process and avoid violations.
What is Miami’s 40-Year Building Recertification?
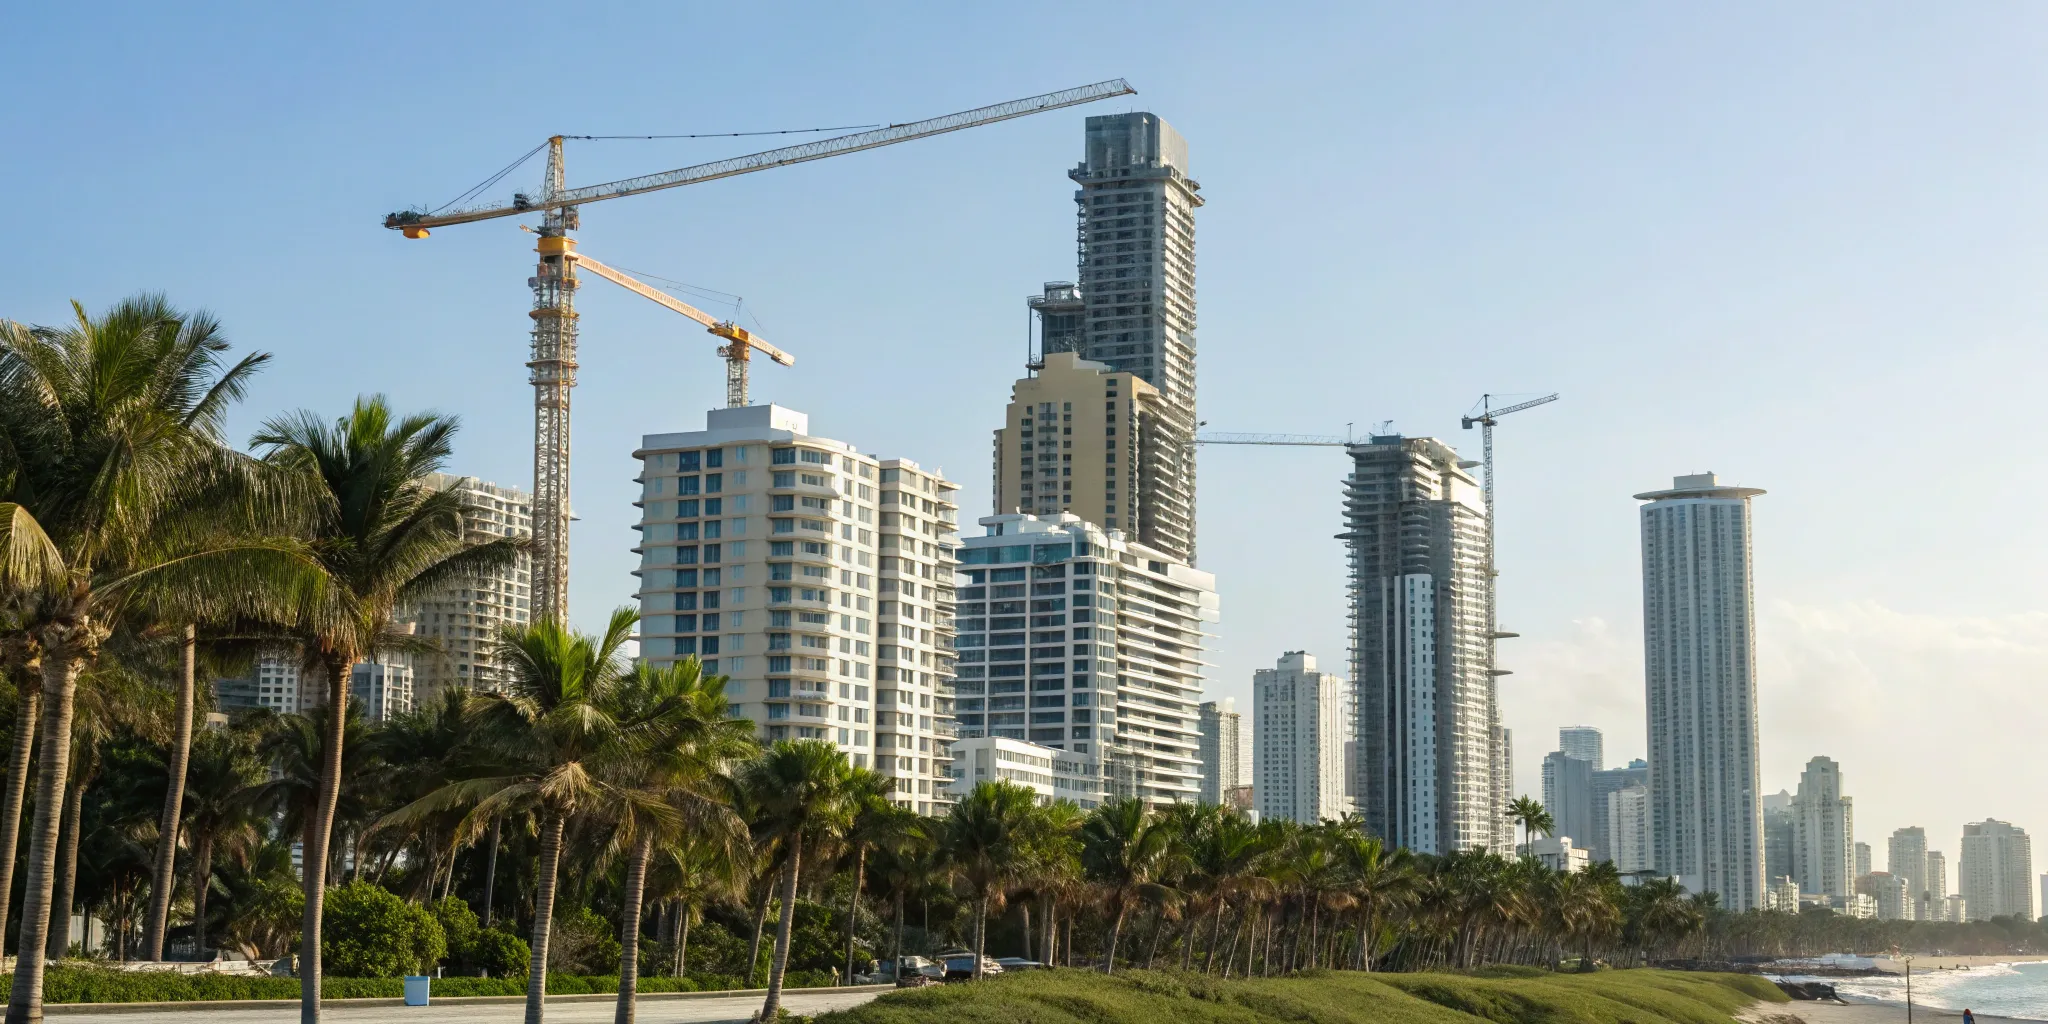
If you own or manage a commercial or multifamily building in Miami Beach, you’ll eventually encounter the building recertification process. Think of it as a required safety check-up for your property to ensure it remains structurally and electrically sound for its occupants. While the idea of a mandatory inspection can feel daunting, understanding the steps involved makes it much more manageable. The process was put in place to protect residents and the public by identifying and addressing potential issues before they become serious problems.
The recertification journey involves hiring a licensed engineer or architect to inspect your property, submitting detailed reports to the city, and completing any necessary repairs. It’s a multi-step process with firm deadlines, so getting started early is key. From identifying if your building is due for inspection to understanding the latest rule changes, having a clear roadmap is essential. Our team handles the complexities of the permitting process every day, and we can help you make sure every document is filed correctly and on time, so you can focus on the physical work that needs to get done.
The Story Behind Miami’s Recertification Laws
A Response to Building Failures
Miami’s recertification requirement isn’t just administrative red tape; it was born from a real crisis. The law was created in 1974 after a building collapse served as a critical wake-up call for the community. In response, Miami-Dade County established this mandatory safety check to ensure aging buildings don’t pose a public threat. This proactive rule shifts the focus from reacting to disasters to preventing them. It requires buildings to undergo a thorough inspection at the 40-year mark, and every ten years after, to confirm they remain structurally and electrically safe for everyone inside.
Protecting Property and People
At its core, the law is about protecting people and property. The inspection is a comprehensive review of a building’s most critical components, conducted by a licensed engineer or architect. They assess everything from the foundation and concrete structures to the main electrical panels and life-safety features. This process safeguards your investment by identifying potential issues early. Completing the building recertification allows for planned repairs, preventing minor problems from becoming costly structural failures and ensuring your property remains a safe, valuable asset for years to come.
Does Your Building Need Recertification?
The first step is figuring out if this process even applies to you. The rules are based on your building’s age. For commercial and multifamily buildings constructed on or after 1993, the first recertification inspection is required when the building turns 30 years old. After that initial inspection, you’ll need to repeat the process every 10 years. The City of Miami Beach sends out notices to property owners when their recertification is due, so keep an eye on your mail. You can also check your property’s status online to stay ahead of the curve and begin your preparations.
Buildings Exempt from Recertification
Thankfully, not every property owner needs to mark this recertification on their calendar. The process is specifically designed for larger buildings, so many smaller properties are exempt. According to Miami-Dade County regulations, single-family homes, duplexes, and buildings with an occupant load of 10 or fewer people and an area of 2,000 square feet or less do not need to go through the recertification process. This allows owners of smaller residential properties to focus on regular maintenance without the added requirement of a formal inspection report. If you believe your building falls into one of these exempt categories but want to be absolutely sure, you can email the city directly at buildingrecertifications@miamigov.com with your property address to get official confirmation.
What’s New in Recertification Requirements?
It’s important to know that the guidelines for building recertification aren’t static. In fact, significant updates to the rules and requirements were introduced in 2022. This means that an inspection process from a few years ago might not meet today’s standards. Following these updated guidelines is critical for a successful recertification. Working with professionals who are current on these changes ensures your inspection reports are accurate and compliant from the start, preventing unnecessary delays or rejections from the building department. This is where expert guidance can save you a lot of headaches.
Understanding Local Jurisdiction: County vs. City
When it comes to building recertification, it’s not a one-size-fits-all process, especially in a place like Miami-Dade County. Where your property is located determines exactly who you answer to. Each city, from Miami Beach to Coral Gables, is responsible for its own building recertification rules and procedures. This means the forms, deadlines, and even specific inspection points can vary from one municipality to another. If your property falls within an area that isn’t part of a specific city, known as “unincorporated Miami-Dade County,” you’ll work directly with the county’s Department of Regulatory and Economic Resources. The most important takeaway is that when you receive that recertification notice, your first step should be to identify and contact the specific city or county office governing your property to ensure you’re following the correct set of guidelines from day one.
Don’t Miss These Recertification Deadlines
Once you receive a “Notice of Required Recertification” from the city, the clock starts ticking. Property owners have a 90-day window from the date of the notice to hire a professional engineer or architect and submit the required inspection reports. This deadline is firm, and missing it can lead to violations and fines. Because 90 days can pass quickly, especially if repairs are needed, it’s best to act as soon as you get the notice. You can use the county’s recertification portal to search for your property and confirm your deadlines.
Coastal Building Timelines (25-Year Rule)
If your building is located within three miles of the coastline, it falls under a more frequent inspection schedule. For condominium or co-op buildings that are three stories or taller and were built between 1983 and 1997, the first recertification inspection must be completed by December 31, 2024. After this initial check, they will need to be recertified every 10 years. For newer coastal buildings constructed in 1998 or later, the first inspection is due when the building turns 25 years old, followed by subsequent inspections every 10 years. These stricter timelines acknowledge the harsher environmental conditions coastal properties endure, like salt air and humidity, which can accelerate wear and tear on structural components.
Inland Building Timelines (30-Year Rule)
For buildings situated more than three miles from the coast, the recertification timeline is slightly different. Properties built between 1983 and 1992 must have their first inspection completed by the December 31, 2024, deadline, with subsequent recertifications required every 10 years. If your building was constructed in 1993 or later, the initial inspection is required when it reaches 30 years of age, followed by the standard 10-year cycle. While these buildings may not face the same coastal pressures, this process ensures their long-term structural and electrical integrity remains intact, providing safety and peace of mind for everyone who uses the property.
The 2024 Transition Deadline
The December 31, 2024, deadline is a major milestone in Florida’s building safety regulations, impacting a large number of older properties across the state. This date serves as a hard cutoff for many buildings constructed before the early 1990s to complete their first recertification. Because this deadline affects so many properties at once, it’s wise to anticipate a high demand for qualified engineers, architects, and contractors. Waiting until the last minute could leave you scrambling for resources and risking non-compliance. If your property falls into this category, the time to act is now. We can help you get organized and request a proposal to ensure your project stays on track and meets this critical deadline.
How Much Does 40-Year Recertification Cost?
The cost of building recertification can vary widely, so it’s smart to plan your budget early. Several factors influence the final price tag, including the size and complexity of your building, the scope of the inspections, and, most significantly, the extent of any required repairs. Your primary costs will include the fees for the inspecting engineer or architect who prepares the reports. If they uncover issues, you’ll also need to budget for the cost of materials and labor for repairs, as well as any associated permit fees. To get a clearer picture of the costs for your specific project, you can request a proposal to understand the permitting expenses involved.
What to Expect During a 40-Year Recertification Inspection
The building recertification process is a thorough health check-up for your property, designed to confirm it remains safe for everyone who uses it. Think of it as a two-part examination focusing on the building’s core systems: its structural skeleton and its electrical nervous system. A licensed professional engineer or architect will conduct a detailed visual inspection of your property, looking for any signs of distress or failure. This isn’t just a quick walkthrough; it’s a comprehensive assessment that dives into the essential components of your building.
The goal is to catch potential problems before they become major hazards. The inspector will evaluate everything from the foundation to the roof and scrutinize the electrical wiring and safety features. After the inspection, you’ll receive a detailed report outlining their findings. This report is the key document you’ll need to submit to the city to prove your building is in compliance. Our team can help you manage this entire process, from coordinating inspections to filing the final paperwork, ensuring everything is handled correctly and on time.
Checking for Structural Integrity
The structural inspection is the foundation of the recertification process. A Florida-licensed engineer or architect will carefully examine all the critical structural elements of your building to ensure they are sound. This includes looking at the foundation, roofing systems, masonry walls, steel frames, balconies, and any waterproofing. They are specifically searching for signs of deterioration that could compromise the building’s integrity.
The inspector will identify issues like cracks in concrete, signs of settlement, or damage to support beams. In a coastal environment like Miami Beach, they pay special attention to the effects of salt and moisture, which can accelerate wear and tear. The final report will detail the condition of these elements and confirm that the building is structurally safe for continued use.
Expanded Review of Façades, Foundations, and Seawalls
The scope of the structural inspection has grown significantly, so it’s important to know what your engineer will be looking at. The review now covers the entire building façade—basically, the whole exterior of your building, including cladding and anything attached to it. Inspectors are checking for damage or anything that could potentially fall off. This comprehensive look also includes foundations, parapet walls, and, for waterfront properties, seawalls. According to Miami-Dade County guidelines, these inspections check the building against the codes that were in place when it was originally built, not necessarily the newest building codes. This is a critical detail that can affect the scope of any required repairs.
Parking Lot and Guardrail Safety Checks
The recertification process also extends beyond the building itself to include important safety features on your property. Inspectors will verify that your parking lot lighting and any guardrails, especially those near water, meet current county standards. Parking lot safety is a key part of the recertification, ensuring the entire property is safe for residents and visitors. If the inspection finds that guardrails are missing where they are required, you will need to install them. This work requires a permit, a step that can add time to your project if you’re not prepared. Handling the permitting for these types of repairs efficiently is crucial to meeting your 90-day deadline.
Inspecting Your Building’s Electrical System
Alongside the structural review, the electrical system gets its own detailed inspection. This assessment confirms that your building’s electrical infrastructure is safe, functional, and up to current code standards. An inspector will check the main service panels, wiring, conduits, and grounding. They also focus on critical life-safety systems, as many older buildings may not meet modern requirements for things like exit signs, emergency lighting, and fire alarms.
Outdated or faulty electrical systems are a significant safety risk, so this part of the inspection is crucial. The inspector will identify any hazards, such as overloaded circuits or deteriorating wiring, that need to be addressed. Bringing these systems into compliance not only satisfies the recertification requirements but also protects your property and its occupants from potential dangers.
Infrared Thermography for Electrical Systems
During the electrical inspection, your engineer will use a special camera for a process called infrared thermography. This is a smart, non-invasive way to see problems the naked eye would miss. It’s particularly critical for electrical systems rated at 400 amps or more, as required by the recertification process. The technology detects heat signatures to pinpoint hidden issues like overloaded circuits, poor connections, or deteriorating wiring—problems that generate excess heat long before they cause a major failure. By identifying these “hot spots” early, you can make targeted repairs and prevent potential fire hazards. This advanced diagnostic is a key part of what the 40-year inspection entails, ensuring your building’s electrical system is safe and up to code.
Get Your Paperwork in Order
Proper documentation is a critical piece of the recertification puzzle. Before you can even schedule an inspection, you’ll need to get your paperwork in order. The most important document is the official recertification report, which must be prepared and signed by your Florida-registered professional engineer or architect. This report formally presents the findings of both the structural and electrical inspections to the city.
In addition to the report, it’s helpful to have original building plans and records of any major repairs or renovations on hand. Having these documents organized will make the process smoother for your inspection team and can help prevent unnecessary delays. If you’re unsure what you need, our experts can guide you through the requirements and help you prepare a complete submission package.
New Documentation: Photos, Site Plans, and Permit History
The latest updates to the recertification process place a much stronger emphasis on visual proof. It’s no longer enough to just describe the condition of your building; you now need to show it. According to the updated county guidelines, your final report must include clear photos and detailed site plans to support the inspector’s findings. This change helps the city get a complete and accurate picture of your property’s health, leaving less room for interpretation. Think of it as building a case for your property’s safety—the more organized and thorough your evidence, the smoother the review will be. Compiling this information, along with a complete permit history of past repairs, demonstrates a commitment to maintenance and can significantly streamline all the permitting services required for compliance.
How to Choose a Qualified Inspector
Choosing the right inspector is one of the most important decisions you’ll make in the recertification process. You must hire a Florida-licensed and insured professional engineer or architect who has specific experience with the building recertification program in your municipality. A qualified professional does more than just identify problems; they help you understand the condition of your building and plan for future maintenance and repairs.
When vetting potential inspectors, ask for references from similar projects and review their qualifications. It’s wise to get proposals from a few different firms to compare their approach and fees. A thorough inspector will provide a clear, detailed report that not only satisfies the city’s requirements but also serves as a valuable roadmap for maintaining your property’s long-term health and safety.
Avoid These Common Inspection Issues
During a 40-year recertification, inspectors often uncover a predictable set of issues, especially in older coastal buildings. One of the most frequent problems is concrete spalling, which is when concrete begins to chip or break away, often due to the corrosion of the steel rebar inside. This is a direct result of prolonged exposure to salt and moisture.
Other common findings include significant structural cracks in walls or support columns, water intrusion from leaking roofs or poorly sealed windows, and visible corrosion on steel components like railings and structural beams. Identifying these issues is the first step toward fixing them. Addressing them promptly not only ensures you pass your inspection but also prevents minor problems from escalating into much larger, more expensive repairs down the road.
How to Plan and Budget for Recertification
Facing a 40-year recertification can feel overwhelming, but a solid plan and a clear budget are your best tools for a smooth process. Think of it less as a hurdle and more as a structured health check-up for your building. By planning ahead, you can manage costs, avoid last-minute scrambles, and ensure your property remains safe and compliant for years to come. The key is to be proactive rather than reactive. Waiting until you receive an official notice can put you on a tight deadline, leading to rushed decisions and potentially higher costs.
Instead, you can take control by mapping out your timeline, understanding potential expenses, and assembling the right team. This approach transforms the recertification from a stressful obligation into a manageable project. It allows you to identify and address issues on your own terms, secure better pricing for repairs by avoiding emergency rates, and keep residents or tenants informed every step of the way. With the right strategy, you can confidently meet all requirements and protect your investment. Our team at All Florida Permits can help you create a customized plan with our end-to-end services.
Set Your Recertification Timeline
Once a building reaches its milestone age, the local building department will issue a recertification notice to the property owner, officially starting the clock. Don’t wait for that letter to arrive. A smart timeline begins long before the official notice. Start by marking your building’s 40th anniversary on the calendar and work backward. Your timeline should include key milestones like hiring an engineer, scheduling a pre-inspection, obtaining quotes for potential repairs, completing the work, and submitting the final report. Building in buffer time for each step will help you handle any unexpected delays without stress.
Acting on Early Courtesy Notices
Getting a letter from the city doesn’t have to be a cause for panic. In fact, Miami-Dade County now sends out “courtesy notices” one and two years before your official recertification deadline, giving you a valuable head start. Think of these notices as a friendly nudge to get organized. Acting on this early warning is the smartest move you can make. It gives you plenty of time to schedule a pre-inspection, which can reveal any necessary repairs long before the official deadline pressure begins. This foresight allows you to budget thoughtfully and complete the work without the stress of the 90-day window that starts with the “Notice of Required Recertification.” By taking advantage of this early notice, you can transform a mandatory compliance task into a manageable project, ensuring your building recertification goes smoothly and without costly surprises.
How to Prepare for Your Inspection
The best way to pass the official inspection is to know what to expect. A pre-inspection with a qualified engineer or architect is like a dress rehearsal for the real thing. It helps identify potential issues early, allowing you to budget for repairs and avoid surprises during the official inspection. This preliminary review gives you a clear, prioritized list of what needs to be fixed, from minor concrete spalling to more significant electrical updates. Addressing these items beforehand not only makes the official inspection go more smoothly but can also prevent a failed report and the costly delays that come with it.
Conducting Preliminary Visual Checks
Before you even hire an engineer, you can get a head start by performing your own visual check of the property. Walk the grounds and common areas with a critical eye, looking for the kinds of issues an inspector will focus on. Pay close attention to concrete surfaces for cracks or spalling, check balconies and railings for signs of corrosion, and look for any evidence of water intrusion around windows or on ceilings. This isn’t a substitute for a professional assessment, but it gives you a baseline understanding of your building’s condition. Documenting what you find with photos and notes will help you have a more productive conversation when you do bring in an expert for the official building recertification inspection.
Gathering Key Building Documents
Proper documentation is a critical piece of the recertification puzzle. Getting your paperwork in order early will make the entire process run more smoothly. The most important document is the official recertification report, which will be prepared and signed by your Florida-registered professional engineer or architect. However, you can support their work by gathering other key records ahead of time. Pull together your building’s original construction plans, the permit history for any major renovations or repairs, and any previous inspection reports. Having these documents organized and ready will give your inspection team a complete picture of the property, helping them work efficiently and preventing unnecessary delays in filing the final report with the city.
Setting Up Your Reserve Fund
Strategic financial planning is the foundation of a successful recertification. For condo associations and building owners, this means establishing and maintaining a healthy reserve fund. This fund is a dedicated savings account for major repairs and capital expenditures, and it’s crucial for covering recertification costs without levying large, unexpected special assessments on residents. Regularly contributing to this fund over the years makes the financial side of the building recertification process much more manageable. It ensures you have the capital on hand to address necessary repairs promptly and keep your building in top condition.
How to Keep Your Project on Budget
Keeping recertification costs under control requires careful management. Once your pre-inspection identifies necessary repairs, get at least three quotes from licensed and insured contractors. This helps ensure you’re getting competitive pricing for quality work. It’s also wise to prioritize repairs based on urgency, addressing critical structural and electrical safety issues first. Remember that addressing routine maintenance and minor repairs as they arise is always more cost-effective than dealing with larger, more complex problems down the line. For help managing the permit-related costs and paperwork, you can always request a proposal to see how we can streamline the process.
Assembling Your Recertification Team
You can’t go through recertification alone. Property owners must submit written reports prepared by a Florida-registered professional engineer or architect. This professional will be your most important partner, conducting the inspections and certifying the building’s safety. When choosing an engineer or architect, look for someone with extensive experience in recertifications for buildings similar to yours in Miami Beach. Alongside your inspector, a permit expediter can handle the administrative load, ensuring all paperwork is filed correctly and on time with the city. Assembling a reliable team is the single best step you can take for a successful outcome.
How to Handle the Inspection and Repairs
Once the initial inspection is complete, you’ll have a clear picture of your building’s condition. If the report comes back with required repairs, it’s time to create a plan of action. This phase is all about addressing the issues methodically to ensure your building meets all safety standards and successfully passes the recertification process. Tackling repairs, managing paperwork, and communicating with officials can feel like a lot, but breaking it down into manageable steps makes it much easier. From understanding safety requirements to organizing your documents, a structured approach will help you move forward efficiently and avoid unnecessary delays or fines.
Meeting Miami’s Core Safety Standards
The entire point of the 40-year recertification is to confirm that your building remains safe for everyone who uses it. Think of it as a critical safety check-up. If your property passes the inspection, you’ll receive a recertification certificate that’s valid for the next ten years. If it doesn’t pass, you’ll be required to make specific repairs before a re-inspection can occur. This isn’t just about checking a box; it’s a fundamental part of property ownership in Miami Beach that ensures the long-term structural integrity of older buildings. Our team can help you understand the report and manage the necessary steps for your building recertification.
How to Fix Common Building Issues
Inspectors have a trained eye for problems that can compromise a building’s safety. Some of the most common issues they find include concrete spalling (when concrete starts to break away), structural cracks, water intrusion, and corrosion of reinforcing steel. These problems often happen over time due to Florida’s climate, but they can’t be ignored. Knowing what inspectors are looking for can help you be more prepared. A pre-inspection walkthrough can give you a heads-up on potential problem areas, allowing you to get ahead of any major repairs that might be flagged in the official report.
Finishing Your Required Repairs on Time
After you receive the inspector’s report, you’ll have a list of mandatory repairs. It’s essential to complete every single item on that list. The cost and timeline will depend on the extent of the work, but cutting corners is not an option. This is where the process can get complicated, as many repairs will require their own permits. Working with a professional permit expediter can streamline this phase, ensuring all work is properly documented and approved. To get a better idea of what your project might entail, you can request a proposal to see how we can help manage the permitting for your repairs.
Using the Repair “Safe Harbor” to Avoid Violations
If your inspection report comes back with a list of required repairs, take a deep breath. The city offers a “repair safe harbor,” which is essentially a grace period that allows you to address the issues without facing immediate penalties. After your engineer or architect submits the report, you have a 60-day window to file for the necessary construction permits. Meeting this deadline is critical because it keeps you off the city’s violation list and helps you avoid fines. This provision gives you a clear, structured path to get the work done and ensure your property is safe. Taking advantage of this timeline is a key part of a successful building recertification, turning a daunting task into a manageable project.
A Simple System for Organizing Your Documents
Good record-keeping is your best friend during the recertification process. You’ll need to submit a final written report prepared by your Florida-registered professional engineer or architect. This report officially documents their findings and confirms that the building is safe for occupancy. Be sure to keep all related paperwork in one place, including the initial inspection report, quotes from contractors, proof of repairs, and all permit documentation. Having everything organized will make submitting your final package to the building department a much smoother experience. You can find official guidelines on the Miami-Dade County website.
What to Do if You Get a Violation Notice
If you miss a deadline or fail to complete required repairs, you may receive a violation notice from the city. Don’t panic, but do act quickly. A violation notice will outline the issue and give you a specific timeframe to resolve it. Ignoring it can lead to significant fines and further complications. The best course of action is to immediately contact your engineer or a permit specialist to create a plan to address the violation. Clear communication with the building department is key to showing you’re working in good faith to bring your property into compliance.
What Happens After the Inspection?
Once the inspector has reviewed your property, you’ll receive a report detailing their findings. This is a pivotal moment in the recertification process. If your building passes with flying colors, congratulations! You’re ready to submit the final paperwork. If the report calls for repairs, don’t worry—this is very common, and it’s exactly what the process is designed to catch. The next steps are all about addressing those findings methodically, managing your timeline, and ensuring your building is safe for the long haul. Let’s walk through what you can expect after the inspector leaves.
How to Submit Your Final Recertification Report
After all required repairs are completed and your property is up to code, the final step is to submit a new, clean report to the city. According to the City of Miami Beach, this is officially called the “Final Report,” and it serves as the legal confirmation that your building meets all safety standards. This isn’t just another piece of paper; it’s the document that officially closes out your recertification case. It must be prepared and signed by your licensed engineer or architect. Getting this report filed correctly and on time is critical to avoiding further notices or penalties. Our team can help you manage the paperwork and coordinate with your professionals to ensure your final submission is complete, accurate, and accepted without any issues.
Using Official County Report Forms
When it comes to paperwork, the details matter. The city is very specific about the format of your submission, and you must use the official Miami-Dade County report templates. Submitting a custom-made form, no matter how professional it looks, will result in an automatic rejection, sending you right back to square one. It’s also important to stay current, as new forms are required starting in January 2025 for the upcoming cycle. Using outdated paperwork is another common mistake that can cause unnecessary delays. This is precisely the kind of detail that a permit specialist manages, ensuring your entire submission package uses the correct, most up-to-date county forms from the very beginning.
Submitting Reports Online vs. In-Person
Thankfully, you don’t have to spend your day waiting in line at the building department. Miami-Dade County offers a convenient online portal that streamlines the submission process. Through the portal, you can upload your completed reports, pay any associated fees, and check the status of your recertification from your office or home. The system even accepts reports with digital signatures from your engineer or architect, which saves a significant amount of time. While in-person submission is still an option, leveraging the online portal is a much more efficient way to manage your project. At All Florida Permits, we use these digital tools to expedite the process for our clients, ensuring everything is filed quickly and correctly.
How to Request an Extension
Sometimes, even with the best planning, delays happen. You might be waiting on materials, dealing with contractor schedules, or facing unexpected permit hold-ups for the repairs themselves. The City of Miami Beach understands this and allows you to request a one-time, 60-day extension to either submit your report or get the necessary permits. However, this isn’t something you can ask for yourself. The request must be made in writing by your project’s engineer or architect, detailing the reasons for the delay. This is where having a professional team is invaluable. We can coordinate with your design professionals to submit the extension request properly, giving you the breathing room you need to get the work done right without facing penalties.
Understanding the Appeals Process
If your building doesn’t pass the initial inspection, it’s not the end of the road. The process is designed to guide you toward compliance. When a building fails, the owner is required to make the necessary repairs and then have the property re-inspected. Think of the initial report as your roadmap for what needs to be fixed. Your job is to hire qualified contractors, secure the right permits for the work, and get the repairs done. Once the work is complete, your engineer or architect will conduct another inspection to verify that all issues have been resolved. From there, they can issue the clean report needed to finally achieve compliance and close out the process.
How to Stay Compliant After Recertification
The 40-year recertification is more than just a requirement; it’s a fundamental part of responsible property ownership. This process is a critical step in ensuring your property remains safe and compliant with the latest Florida Building Code standards. It’s an opportunity to address decades of wear and tear before minor issues become major problems. By taking recertification seriously, you’re not just checking a box—you’re investing in the long-term safety and value of your property. Our building recertification services are designed to help you not only pass this milestone but also establish a maintenance baseline that will make your next recertification in ten years much smoother.
How to Avoid Penalties and Fines
Staying on top of deadlines is the best way to avoid unnecessary costs and legal headaches. Non-compliance with building recertification regulations can lead to significant consequences, including steep daily fines and even liens placed against your property, which can complicate future sales or financing. The key is to be proactive. Start the process early, hire a qualified team, and address any required repairs promptly. The cost of proactive compliance is almost always lower than the cost of penalties and emergency repairs under pressure. By creating a clear plan and working with experts who understand the system, you can ensure a smooth process from start to finish. Let us help you develop a strategy to meet every deadline and keep your project on track.
Understanding the Fee and Fine Structure
The cost of building recertification can vary widely, so it’s smart to plan your budget early. Several factors influence the final price tag, including the size and complexity of your building, the scope of the inspections, and the extent of any required repairs. Your primary costs will include the fees for the inspecting engineer or architect who prepares the reports. If they uncover issues, you’ll also need to budget for materials, labor, and any associated permit fees. Failing to submit reports on time triggers an initial $510 fine, with penalties that can climb as high as $10,000 per violation. This is why a pre-inspection is so valuable—it gives you a clear understanding of the scope of work and helps you avoid the financial pressure of last-minute penalties.
Beyond Fines: Other Consequences of Non-Compliance
While the financial penalties are significant, the other consequences of non-compliance can be even more disruptive. If a property remains out of compliance, the county can place a lien on it, creating a major roadblock for any future sale or refinancing attempt. Insurance providers may also increase your premiums or cancel your policy altogether, viewing the building as too high-risk. In the most serious cases, you could receive a violation notice for unsafe conditions that demands immediate action. Ignoring a notice is never the answer. The best course of action is to immediately contact your engineer and a permit specialist to create a plan and get the necessary help to resolve the issue.
Related Articles
- A Guide to the Miami-Dade 40 Year Recertification Search
- How to Pass a 40-Year Building Inspection: A Guide
Contact Us
Frequently Asked Questions
My building is approaching its 30-year mark. Should I wait for the official notice from the city to get started? Absolutely not. Waiting for the official notice puts you on the city’s 90-day clock, which can create a lot of unnecessary pressure. By starting the process a year or two early, you give yourself time to find the right engineer, conduct a pre-inspection to identify potential issues, and budget for any necessary repairs without a looming deadline. This proactive approach turns a stressful requirement into a manageable project.
What’s the real difference between the structural and electrical parts of the inspection? Think of it this way: the structural inspection is a check-up on your building’s skeleton. The engineer examines the foundation, walls, balconies, and roofing to ensure the core structure is sound and free from serious deterioration. The electrical inspection focuses on the building’s nervous system. It covers everything from the main service panels and wiring to critical safety features like emergency lighting and fire alarms, making sure it’s all safe and up to code.
Are the repairs themselves the only major cost I need to budget for? While the cost of physical repairs is often the largest and most variable expense, it’s definitely not the only one. You also need to account for the professional fees for the licensed engineer or architect who conducts the inspections and prepares the detailed reports. Additionally, if repairs are needed, you will have costs associated with securing the necessary building permits for that work.
Do I need to get separate permits for the repairs identified in the inspection report? Yes, in most cases you will. The recertification report identifies what needs to be fixed, but actually performing that work often requires its own set of permits from the building department. This is a separate process that involves submitting plans and getting approvals before any construction can begin. Managing these permits is a critical step to ensure all your repair work is properly documented and compliant.
What happens if my building fails the inspection? Does that mean I’m in serious trouble? Failing an inspection is quite common and it’s not a reason to panic. It simply means the process is working as intended by identifying safety issues that need attention. The inspection report will serve as your to-do list, outlining the specific repairs required to bring the property into compliance. Your responsibility is to complete that work, have it re-inspected, and then submit a final, clean report to the city.